Showing posts with label QAYG. Show all posts

Friday, July 7, 2023

First week of July

This week I finished off the edges for my whitework.  The border is done with a double back stitch and the square around the centre design is cable stitch (reverse faggoting)

Yesterday I learnt a slightly different backstitch to add to the edging.


I did sew my shirt blocks together ....  it is so hard to get a balance of colours when it is like this but eventually I had to just sew them..... 

Two quilt tops done - different blocks with the same shirts..... next the quilting.  I have bought some lovely fluffy minky blankets so they will be very snug..... 


as soon as I had it down on the floor the cat came in to inspect.......  and destroy!!!


I have started sewing my self binding hexagons using the Field Journal embroideries..... there is quite a pile waiting to be done.....

Though very pretty liberty fabrics were included I decided I wanted a softer pallete with mine (so I will use the liberty fabrics for something else)

I do love it..... long long way to go....


This week I did some catch up on my monthly QAYG by On Williams Street.  The blocks are being made using the colours for RSC and the quilting by OWS instructions....
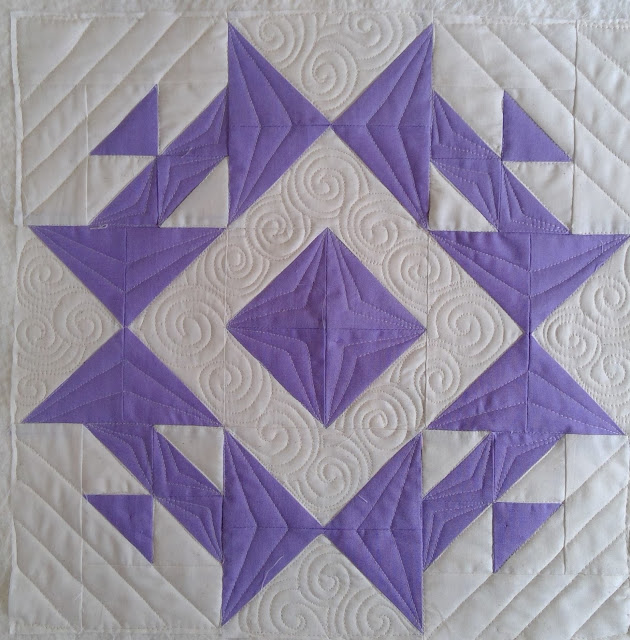

April, May and June.....


Fun learning some different quilting designs and she is helping with getting an eye in to not have to stop start but keep going into the next section....


Quilt Group have started a Mystery Quilt.....  I only agreed to participate because a couple of other friends said they would ... and I could get the fabrics ready chosen by the club as mine will be a Community Quilt...

First section is done... cutting and labelled!  I now have the first 'clue' so will start that next week


One of the embroidery ladies gave me a good tip for my hoop... to add bias around the edge so that it gives better grip....


It was a little bit fiddly sewing it but easier than I thought it would be ....   and it does make a difference.  

I am yet to get some nylon ribbon to add to the other part of the hoop.


So there we have my crafty week.....  

Righto, Gotto Go... It's a Friday sew day... morning with friends and afternoon with the quilting machine ......

Have a lovely weekend.....xx


Saturday, January 21, 2023

January Week 3


Another week gone past so quickly.  

This block has been worked on for a couple of weeks and finally finished....


And three more 'pies' were appliqued onto background....


Some machine time over the week saw the blocks added to the others and now I have a completed centre of Civil War Bride....


I love it.... the borders are traced and I will slowly do parts of it over time..... not rushing

I started another quilt for Rainbow Scrap Challenge .... this block is 15 1/2" and I will make it in each months colour with the cream seeded background.  

The block is for a Quilt As You Go quilt-along hosted by On Williams Street and each month we will be given a different quilting design to do.  I think it will be great and help me with quilting ideas as well as use up some of my scraps.

I often buy cotton sheets (not high thread count) to use as backings and have a set of 4 pillowcases which I will cut up and they end up the perfect size for the backings for these blocks.

Hoping over the next couple of weeks to get the quilting done on this block.


Another new project I am starting is 'Gossip in the Garden' from Hatched and Patched.  Michelle and I are going to sew it together  with the loose goal of one section per month....

I have started with this stitchery, done on some plain white....


A lovely pattern with applique, embroidery and of course the best part is making it with a friend....

Righto, Gotto Go.  Youngest daughter is moving in here with teenage son and cat - rental properties remain difficult so this will be their temporary accommodation.  Today is pack up day of her place to put into storage.

.... but first, some freshly made coffee ... have a great weekend.


Tuesday, January 10, 2017

QAYG fabric basket tutorial


I do love to join in sewing with others and my Tuesday sewing friends and I like to do a joint project too....

On Michelle's blog she wrote about a Rainbow Scrap Challenge she is doing -  which is hosted by SoScrappy.  

Anyways, since we all have scraps and I don't like throwing ANY fabric out --- and us Tuesday girls needed a new machine sewing project (Dutch Treat is ongoing hand work) this seems a perfect opportunity to work on my scraps and get them in some sort of order....

This is how I keep them at the moment....


My plan is to make baskets for the different colour scraps - use some up and store the rest!  

There are several fabric basket patterns on the net but I wanted to do a Quilt As You Go  in one piece and couldn't find what I wanted so I adapted.  Now there may well be something similar around  and far better but I thought I would include how I did my  NO waste QAYG scrap fabric basket.

First I wanted to make a single piece of quilted fabric out of scraps (for this experimental basket I used batik scraps) and used THIS tutorial by Elizabeth Hartman at Oh Franson.  My finished size of the rectangle was 17" x 23" so I cut my backing a couple of inches longer and wider and the wadding the correct size.  Then quilted the patches over using Elizabeth's method.


When all the pieces were added I trimmed it all to 17 x 23"


... like this....


Fold the work in half lenthways and cut out corners 3 1/2" x 4" (the 3 1/2" being from the folded base up.  Cut carefully around the corner and keep these pieces aside.

And sew the sides together (right sides facing) (I used an overlocker for this)  

You end up with something that resembles a quilted pair of nickers without any elastic!!


Fold the corners lining up the half length fold line with the side seam and sew the boxing seam...


... and that gives you the basket shape....


Here are the pieces that were cut out the base 


Now fold them in half lengthways and sew the seam .. then turn through (this was the most difficult part as they are a bit bulky but just fiddle around ....


Find the side seams of your bag and pin these short lengths to make handles.  I put them about 1/2" on either side of the seam....  Baste them in place.


Make enough binding to comfortably fit around the bag... I did the length plus 4".  Sew it down on the inside of the basket...


Then turn over and sew the binding down..... (of course you can do this by hand)


As you can see this method shows the seams inside.....


.. but it's perfect for what I want ....


The basket has ended up sort of 7 - 8 " square (I say sort of because some sides are 7" and some are 8".  Not perfect but fine for me....


... Hmmmmmm - my overlockers sits in an old plastic cover - it could do with a QAYG cover sometime..... 


So I used up some scraps and I am also using up some of my lovely threads left over from quilt projects (not enough to use for a big project)


For the linings I am using left overs from backings (so officially scraps too!!!) .... sometimes I need to join them...


and I have a couple of linings (also made from scraps)  and the wadding scraps .... 

my first newly made UFO in the bag to make one colour per month...


SoScrappy gives more information about it HERE if you are interested...  basically she chooses a colour and you choose what you want to make with it..... 

Righto, Gotto Go.... this months colour is PURPLE and I need to go and sort out my scraps and see what I can find.

Saturday, January 7, 2017

UFO finish .....


The best thing about going through my drawers I realise that there are sometimes projects that don't really need a huge amount of work.....

This QAYG whole quilt is one of them...... and now it's done and I love it....


The main photo is a good reflection of the colour - I used a mottled light blue for the top and a plain light blue for the back.

These close up pictures don't show the colour well and the trapunto sometimes looks like it is receding and not puffy..... but it still gives an idea of the work involved....


This was all quilted on a small domestic sewing machine - so I'd like to encourage anyone wanting to do some Free Motion Quilting.  Go for it and you don't need a big machine - just the hopping foot and some patience.  Smaller pieces are much easier when learning - make placemats, mug rugs, bags etc - or put together a quilt like this.

Righto, Gotto Go.... I want to go and stroke my quilt!!! 


Related Posts with Thumbnails
>