I do love to join in sewing with others and my Tuesday sewing friends and I like to do a joint project too....
On Michelle's blog she wrote about a Rainbow Scrap Challenge she is doing - which is hosted by SoScrappy.
Anyways, since we all have scraps and I don't like throwing ANY fabric out --- and us Tuesday girls needed a new machine sewing project (Dutch Treat is ongoing hand work) this seems a perfect opportunity to work on my scraps and get them in some sort of order....
This is how I keep them at the moment....
My plan is to make baskets for the different colour scraps - use some up and store the rest!
There are several fabric basket patterns on the net but I wanted to do a Quilt As You Go in one piece and couldn't find what I wanted so I adapted. Now there may well be something similar around and far better but I thought I would include how I did my NO waste QAYG scrap fabric basket.
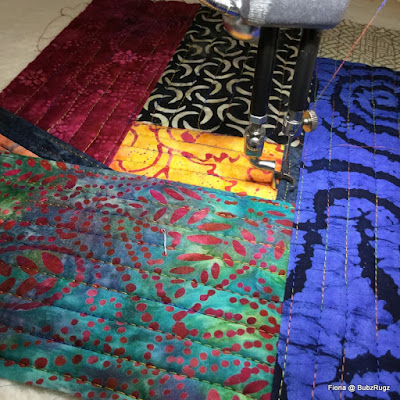
First I wanted to make a single piece of quilted fabric out of scraps (for this experimental basket I used batik scraps) and used THIS tutorial by Elizabeth Hartman at Oh Franson. My finished size of the rectangle was 17" x 23" so I cut my backing a couple of inches longer and wider and the wadding the correct size. Then quilted the patches over using Elizabeth's method.
When all the pieces were added I trimmed it all to 17 x 23"
... like this....
Fold the work in half lenthways and cut out corners 3 1/2" x 4" (the 3 1/2" being from the folded base up. Cut carefully around the corner and keep these pieces aside.
And sew the sides together (right sides facing) (I used an overlocker for this)
You end up with something that resembles a quilted pair of nickers without any elastic!!
Fold the corners lining up the half length fold line with the side seam and sew the boxing seam...
... and that gives you the basket shape....
Here are the pieces that were cut out the base
Now fold them in half lengthways and sew the seam .. then turn through (this was the most difficult part as they are a bit bulky but just fiddle around ....
Find the side seams of your bag and pin these short lengths to make handles. I put them about 1/2" on either side of the seam.... Baste them in place.
Make enough binding to comfortably fit around the bag... I did the length plus 4". Sew it down on the inside of the basket...
Then turn over and sew the binding down..... (of course you can do this by hand)
As you can see this method shows the seams inside.....
.. but it's perfect for what I want ....
The basket has ended up sort of 7 - 8 " square (I say sort of because some sides are 7" and some are 8". Not perfect but fine for me....
... Hmmmmmm - my overlockers sits in an old plastic cover - it could do with a QAYG cover sometime.....
So I used up some scraps and I am also using up some of my lovely threads left over from quilt projects (not enough to use for a big project)
For the linings I am using left overs from backings (so officially scraps too!!!) .... sometimes I need to join them...
and I have a couple of linings (also made from scraps) and the wadding scraps ....
my first newly made UFO in the bag to make one colour per month...
SoScrappy gives more information about it HERE if you are interested... basically she chooses a colour and you choose what you want to make with it.....
Righto, Gotto Go.... this months colour is PURPLE and I need to go and sort out my scraps and see what I can find.


11 comments:
Love your basket Fiona, great way of using up scraps. Your psot is inspirational...might have to try one for me.
Your basket is FABULOUS!!! It will be PERFECT for storing fabric scraps. Have FUN making all the colors!
Fiona, this is a great little tutorial!! I love how you used the cut out corners to make the handles...brilliant! Waste not, want not and all that. That's exactly what I do with the corners of square desserts like brownies: I cut them out and add them to my "love handles."
But seriously, I needed a good QAYG basket tute and I'm saving this for future reference.
I'm here! So inspired by your basket. ❤️❤️❤️
Great way of using up some scraps - I love making baskets so will keep the idea in mind, thanks. xx
Great work Fiona... using the corner cut-out pieces is so clever too.
I actually don't accumulate a lot of scraps, because i cut my bits & bobs into a series of sizes & bag them... but I could always keep a few to make one of these!
x
Lovely use of your scraps, Fiona! I have quite a bag of scraps, must give this a go. Thanks for the tutorial ..... and for the easy handle idea!
Barbara x
Excellent tutorial Fiona and a lovely basket with so many uses . I will try using up some scraps if I can find any lol .
I love this idea....for the handles - have you tried sewing a piece of ribbon across the top of one side - then do the side seam and then you can pull the ribbon to help you turn the tube inside out...
Thank you so much Fiona...fantastic!
how do I follow your blog
Post a Comment