Tuesday, March 26, 2013

For the Gardeners....

There was a couple of open gardens near us this last weekend so a friend and I toodled off for a Sunday afternoon drive to have a look.....

The open gardens scheme is a great idea, a small amount is charged to go in and all the money raised goes to a chosen charity....  

At the first place this house was close to the road... this was the original residence built in the early 1900's


this garden is very spacious 


... and pieces from the old residence have been used in the garden.... I loved this picture...


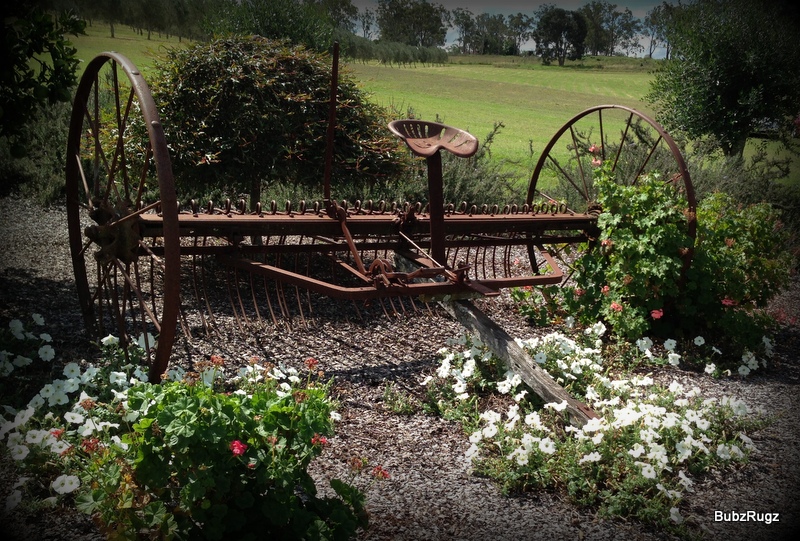
... and some of the old rusty machinery created garden art ......


well, having walked around the big garden we needed a bit of sustenance...


the next garden had this old shed outside....   


... and they made use of sculpture type garden art and grew plants on them... this is an example...


a smaller garden but with denser plantings around the homestead.... this garden is only about 7 years old..


I think my favourite spot was the fernery...


A lovely way to spend a few hours

On the stitching front ... another fun stitchery from Boys Story......


I just love the expressions!!!


Righto, Gotto Go..... I want to make plans for my garden now!  I hope Hubz is feeling energetic this weekend!

Monday, March 25, 2013

March Christmas Item....

I have joined in with Narelle's One Christmas Item a Month challenge


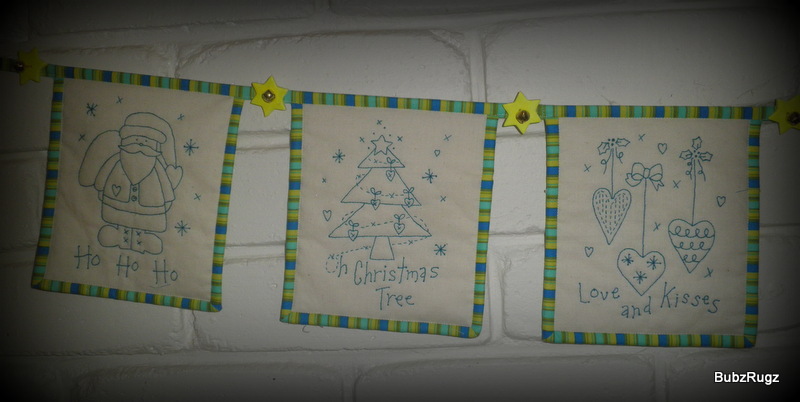
 and have finished this banner (which also happens to be a UFO from last year)


I love all the little stitchery pictures....


 ... I'm sure I will use them again ...


This was a free design in 2011 from SewHappyMe...... I'm so glad I have finally done it....

I had made these little white star buttons for a different project last year and had some extra's ... and I just coloured them with a highlighter for the fluro stars I wanted... and added a little gold bell in the middle....


.. that's what happens when you are 30 minutes out of town and too impatient to wait to buy what you want...

Looking for inspiration for Christmas projects... have a look HERE... (WARNING... you will want to do these....)

Thanks to Dawn and Wendy and all the enablers at Sew It's Finished  too.... slowly the UFO's are getting done

Righto, Gotto Go - next months Christmas Item to plan  find....
(I know I did the stitchery ... I just can't find it!!!!)

Saturday, March 23, 2013

So much for FNSI plans......

Thanks to Heidi who hosted this months FNSI ...... especially since she has had a number of things to deal with at the moment.... thinking of you ....

So..... these blocks were my plans (as per my last post.....)


but in the morning I was looking at this scrappy quilt top I made last year 
(I'm still in love with it.....)
I feel it's very arrogant of me to be in love with my own handiwork
.... but I am ......


... and I would love to have it on my bed.....

It's full of piecing


with some chain stitching and needleturn


so onto the table it went with the backing and wadding


 now in an ideal world I think one should decide on how the quilting is to be done before attaching it  to the wadding and do any marking at that stage ... but I didn't and as I started pinning ideas were coming to me....

I want to do feathered circles in the plain squares down the sides.... so kitchen utensils of the right size were utilised....


... then I rather like a flower quilted inside the pieced flowers so I made a template to trace around...


I use this quick laminate... 

trace or photocopy the template and place it in the sticky laminate... then cut it out

it is not as firm as two sided laminate but it does the job and if you wanted you can laminate the other side for extra strength...


I love pictures of the pins in the quilt... so there it is....


I have gone for cross hatching around the border... as it is a large quilt (200 x 221cm or 79 x 87") and the crosses are 1" apart.. there was a lot of lines to draw....


Finally I sat down and did some hand stitching while watching "Under the Tuscan Sky" - great fun but I liked the book more - perhaps because there was more accent on the food in the book! ....

... chain stitch for a different project altogether...


Righto, Gotto Go... I still have the North Pole blocks to do!!!

Friday, March 22, 2013

A scarf, two aprons and a couple of blocks.....

I've told you before about the lovely scarves at Maya Kotan

On my trip to UK last year I was given the opportunity to put some colours together

and look what was given to me....


Here's the ticket that shows who made it... the design name (see the FIO - that's me!!) and the colours used

my very own unique scarf... made from the colours I had chosen

how lucky am I?


PS ... there is a SALE on at Maya Kotan at the moment......

Jude (my DIL) suggested that I could cut the woven fabric and make something..... I'm thinking about it?

... and so onto aprons for little peoples who want to help nana in the kitchen ...

On one of my 'op shop' hunts for pre-loved fabric I found some unused sheeting.... not wonderful quality but I like the pictures.....

.... so that is what I used to make up a couple of little aprons ....


I used a pattern from Annette that I had won in a giveaway.... soooooooooo eeeeeaaaassssyyyy and designed in a way that only one piece of cord is used which can tighten or loosen depending on the size.

The edges aren't hemmed - just went round them with the overlocker - that made it even easier to do!

Perhaps I need one of these in a large size for me.... that can adapt to my shape?
(wonder how many bears I would take)

Righto, Gotto Go.... I have blocks for North Pole quiltalong to do.....


Oh... and it's

Handmade by Heidi

tonight

Sign Ups are at Heidi's over HERE

no prizes for guessing what I'll be sewing!


Wednesday, March 20, 2013

Pincushions....

This months SAL sewing is these cute little pincushions .....


.... from Anni Downs 'Some Kind of Wonderful'


They are just dinky little things.... and it is so fun seeing all the different ones

Kris's tip HERE was great as I wanted to add some weight in the pincushion - I used stuffing beads and then polyester stuffing on the top .....

Righto, Gotto Go..... widget loves to help doing 'jobs' when he visits but he has noticed he does not own an apron when he is the 'cook' or 'washerupper' .... so that's my 'job' this week....

This last weekend he helped with the mowing.....


It's so nice to have company when driving!

Monday, March 18, 2013

Onwards.....

Thanks for the great tips regarding 1/4" black binding....

I thought I'd share a few of them with you.... just in case you are thinking of making some too!

from Chris
 did a thick satin stitch with my machine, using black cotton. It was so much faster and easier!   I have done several wall hangings this way now and I'm never unhappy with the result.

from Sharon
As for the binding, just grab a clover tool but one where you can add the visofix as up pull it through. I had trouble buying the thin vlisofox for the Clover thingie so just cut it myself, much cheaper too.

Several years ago I did a bias applique workshop and we cut our own fusible stuff using a rotary cutter......not the new blade though. The teacher said she keeps an older blade which only gets used for cutting those strips. Ironing them on took no time at all.

from Katherine
I'd definitely get one of those binding tools ...... are so easy to use. I also use 'crisp' spray starch too. Just watch the steam setting on the iron as I steam burned a finger once. Not a very pleasant experience.

from Marilyn
I have used both bought and "made myself" binding - it is not too difficult to make and definitely cheaper. I used the 1/4 inch steam a seam. I have also cut 1/4 inch wide vliesofix for smaller amounts of binding. 

I found a roll of 1/4" vliesofix in my cupboard so I used that... it was just too big to fit into the clover tool but with some gentle persuasion we ironed on happily... I will also need to cut a bit myself as there wasn't enough


I'm leaving this project for a bit now... until I can get to my next lesson - very inconvenient but my tutor has a real job too!

I had a chat with Mr Random this weekend regarding the mug rugs..... he has selected these ladies .... and luckily they had all chosen a different mat... so no fighting ... not that quilters fight.... I knew that....

here we go.....
For Larissa

For Elyte
For Sheri

For Bev

I am really happy when someone wants something I make... so thanks ladies and let me know your snail mail addresses and I'll send these out to you....

It is very hard to visit a quilt shop and not buy anything extra...

I was given a charm pack of "Puttin' on the Ritz" and a couple of weeks found out that I am to be a GREAT AUNT... for the first time.. and it is going to be a girl

so I bought some pretty pink for sashing and pretty spot for binding
... will get to it.... baby is due in July so I have time???


Lastly but definitely not leastly I got some fun mail this week....

Look what Shez sent me as a birthday gift..... I love her towels - they are so useful when they hang on the handle and don't fall off all the time.  Also were included some little boxes to make... for my little handmade soaps and lotions... great idea and thanks so much Shez.....


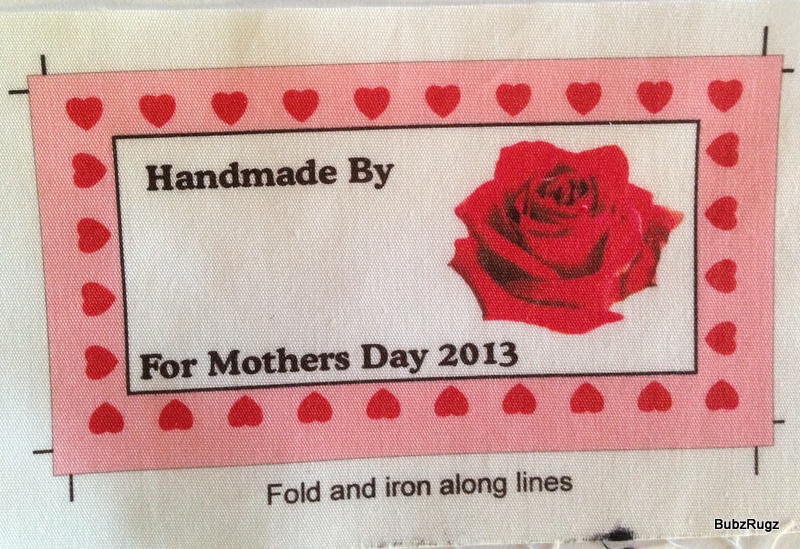
I am going to join in with the mini swap for Mothers Day later this year - Cheryll had some lovely labels she made up and sent me one to go on the back of the mini... such a cute idea...

If you are interested in joining the mini swap... a small item and such fun having different ones to display... pop along HERE and have a read ....


Thanks Cheryll..... thinking hat is on for some ideas on what to make

Righto, Gotto Go.... finishing off pincushions .....

Saturday, March 16, 2013

An Emerging Butterfly.....

I thought I'd show you a bit more of this emerging butterfly
(whilst I am still ultra excited about it)
and also to show anyone thinking about doing one of these what is involved
maybe you will start one too (??? Susan???? you know who you are....)

choosing which fabrics should go where, ironing the applique bonding and keeping them in order took me all morning .....

It wasn't necessary to leave the 1/4" around all the bonding edges - a lot easier and quicker - cut the vliesofix to the shape and then trim just off the edges - doesn't have to be too totally exact as the bias will go over the top and cover any little bits...


I pinned my backing onto the pattern so I could see where to place the pieces

and started pressing them on carefully.....


... this part took hardly any time at all.....


the backing is a pretty pale green ....
(more like the second picture)

now I need several metres of black 1/4" binding.... I am going to make it myself .... I know you can buy it ready made .. and my friend did but it ended up being quite costly ......

... any tips doing this will be much appreciated ...

So I'm off to the shops later to look for black fabric, strip vleisofix, a binding tool, and a twin needle before I can do the next stage ......  I think it will still end up more cost effective....... and give me time to finish off this project for SAL ....


Righto, Gotto Go.....  a couple of pretty pincushions to make .....
I do hope you find some time for fun this weekend

Related Posts with Thumbnails
>